Winpopup LAN Messenger
Cost-effective secure Instant Messaging software.
- 1. Installation
- 2. Opening the Control Panel for the first time and changing the password
- 3. Users
- 4. Message history
- 5. Using the Control Panel from a remote computer
1. Installation
To install the server, download and run the file from the Downloads page.
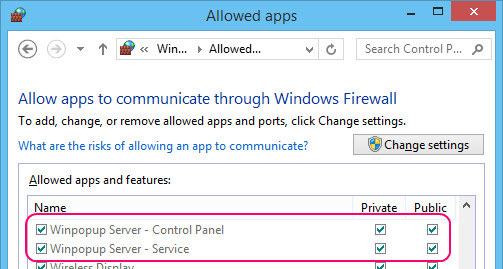
1.1 Authorizing the server with the firewall
For the server to work, tcp and udp 1152 ports must be open. The installer adds two exceptions for the Service and Control Panel in the Windows Firewall. For firewalls by third parties, the server must be manually authorized by the administrator.
2. Opening the Control Panel for the first time and changing the password
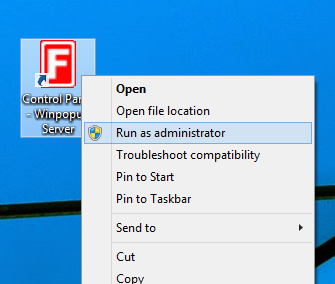
If the Control Panel is being opened for the first time or the password is unknown, it should be run as an Administrator (on the same computer where Winpopup Server has been installed). In this situation, it is not necessary to enter the password.
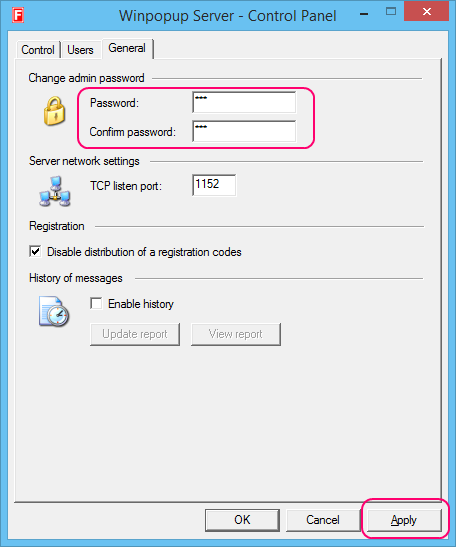
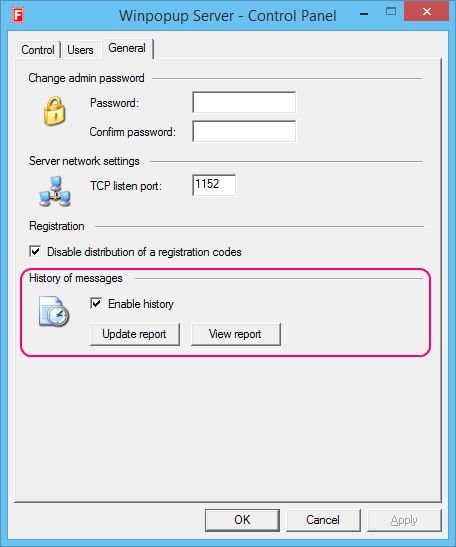
To change the password, go to the General tab, enter the password and password confirmation, and click OK. This password can also be used for remote access to the server (when the Control Panel is installed on another computer).
3. Users
Modes for managing the contact list are located in the Users tab.
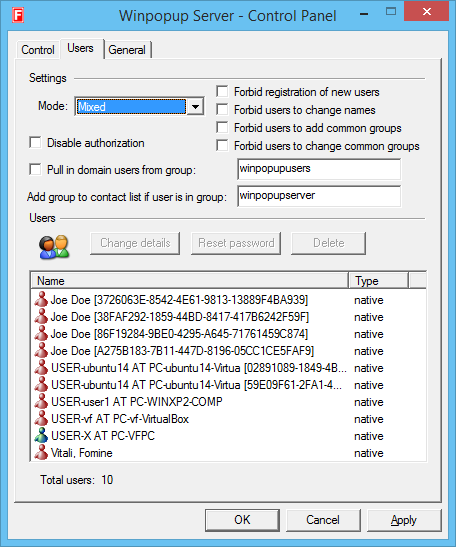
3.1 Native, Domain, and Mixed modes
The server can function in three different modes: Native, Domain, and Mixed. The Native mode uses an internal database to store user information. The Domain mode obtains user information from the Active Directory. The Mixed mode is a combination of Native and Domain; the user information is obtained from the internal database as well as the Active Directory.
3.2 Deleting Users
Users can be deleted only from the internal database (in the Native mode, or users not in the Active Directory in the Mixed mode). In the Domain mode, deleting users is impossible; instead, users are filtered using the function Pull-in users from the group [see 3.3]. To delete users, open the Users tab, select the users from the list, and click Delete.
3.3 Pull-in users from the specified group in Active Directory
This function is used to filter the users from the Active Directory (in the Domain mode). The name of the group is winpopupusers by default.
3.4 Adding groups from the Active Directory to the contact list
To manage groups in the contact list under the Domain mode, create a user account in the Active Directory with the username winpopupserver, then add this user to the desired groups.
4. Message history
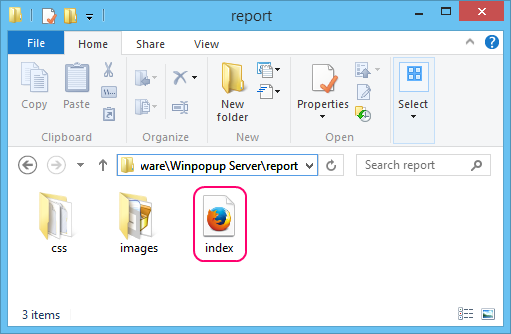
To turn on message logging, go to the General tab, check the Enable history option, and then click OK or Apply. The server keeps a log of all messages, automatically generating an HTML report once every 24 hours, where messages can be viewed. The report is in the folder named %ALLUSERSPROFILE%\Fomine Software\Winpopup Server\report\, with the initial file index.html. The shortcut to the report file is located in the start menu Winpopup Server and on the desktop. The report can also be opened with the View report button in the General tab; however, that works only when the Control Panel is running with administrator rights.
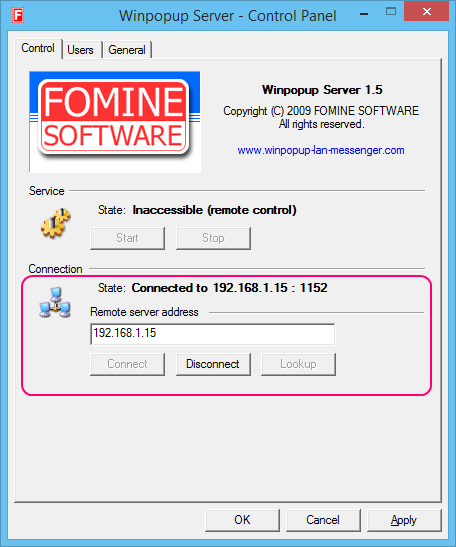
5. Using the Control Panel from a remote computer
The Control Panel can connect to the server from a remote computer. To connect, install the Control Panel (without the server) on the remote computer; the installer is available on the Downloads page. Enter the IP address or the server name and click Connect, then enter the password.